Pixel Mapping
Here is one of the ideas that got stuck with me since the first week of class: taking the light information from a camera or a specific point in space in Unreal and doing some calculations to send the average color into a DMX light in the studio.


And finally, the "Play DMX" button on top starts sending live data over the network to the light. I set up a quick DMX station next to the computer and used the back of a white paper to see the color from the light better.

Since the data is being sent out in real-time, the fun starts when I change the lighting of the Unreal scene and it reflects on the studio light next to me.
While looking for information or ideas on how to achieve this, I've come across an Unreal feature called Pixel Mapping. And yes... this feature was exactly what I had been thinking of creating all this time, so turns out I don't have to reinvent the wheel!
Here is the Unreal Pixel Mapping documentation with more detailed information.
Since this feature didn't seem too complicated to set up, I wanted to give it a try and see how customizable it can be.
This process simply has 3 main actors...
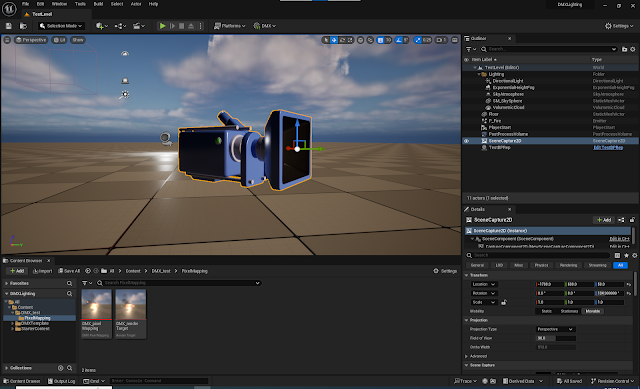
2D Scene Capture Camera: This camera is how the artist can decide which area in the scene will be captured in view and used for color averaging.
Render Target: This actor takes the output from the camera and turns it into a texture.
Pixel Mapping: Yes, there's an actual actor called Pixel Mapping in Unreal and it has all the settings to complete this setup.
Pixel Mapping actor is also where single or multiple DMX lights can be added to render out a specified area on the texture. In the screenshot below, the TestLight_000 box with thin, blue outlines indicates the area in which the colors of the pixels are calculated and sent to the light. With this ability, multiple lights can be added in different areas of the texture to create variants of the same lighting situation.
The purple arrow at the bottom indicates the color box, which is the preview for the color that'll be sent to the light.
The blue arrow to the right points at a fun setting I found while playing around. For color matching (or just artistic) purposes, Pixel Mapping allows the user to change how the channels are mapped for each fixture. The settings allow Yellow Channel to be mapped to Red Channel or Magenta Channel to take over the Green Channel, etc.

(Flashing lights warning for the following video!!)


Comments
Post a Comment